Turkish Occupation for Toe Socks

Turkish Occupation for Toe Socks
Set up

As with any other type of knitting, there are numerous ways to put on stitches for knitting toe socks. The best method for you will be found after you have tried a variety of options. However, we like one known as Turkish Cast-On, mainly because it is relatively simple and does not require the use of waste yarn as a temporary method for putting on toe socks.
You should probably practice a few times before using it on a real sock, as you will be working in loops so the tension will be quite uneven. But it’s quick and easy to work this way so you won’t mind if you need to rip it out and try again.
This method can be done with two circular knitting needles as shown or start with two double-pointed needles and spread the stitches over time to one or two more, depending on how many needles you prefer. First align your needles with the dots to the right and place a slip knot on the lower needle.
Cast stitches
“Cast on” seems to be the wrong term for what happens to the Turkish cast-on because you only wrap the yarn around the needle. Even if we say that, it will feel like you are doing something wrong because you are doing so little, but that is all you are doing.
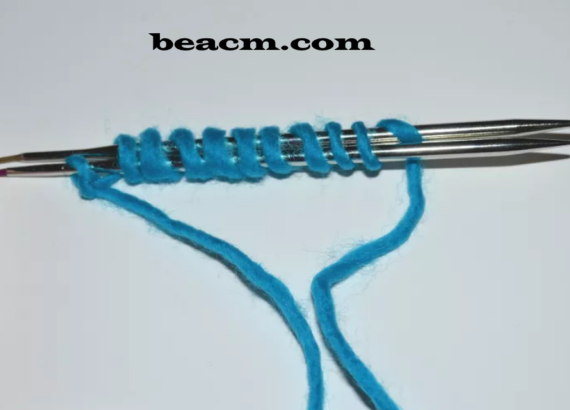
Take the yarn under the needles on the back and over the needles and back to the front of the needles etc. and wrap it around both needles each time.
Repeat this process until you have made enough loops to account for half your required stitches minus one. In this example we made 20 stitches, which means we needed nine loops.
Wrap the yarn around the top needle again and put the yarn between the needles. Now there are 10 “loops” on each needle (counting the slip knot on the lower needle).
Start Knit
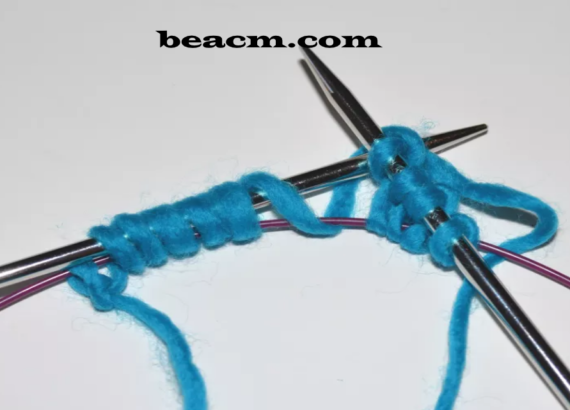
Pull carefully on the lower needle so that the loops (or stitches) on this needle hang from the cable. Use the tip of the other end of the upper needle to knit the “stitches” on the upper needle.
Yes, this will be uncomfortable. As already mentioned, it will be difficult to maintain an even tension. With practice it will be easier.
Completion of the first round
When you have worked the stitches of the first needle, push it onto the cable needle and move the lower stitches to the end of the needle closest to where the working yarn is now so that you can knit these stitches with the other end of the stitch same needle.
The first stitch you make on this side is the slipknot. Be especially careful that you knit with the working yarn and not with the back end.
Continuation of the sock
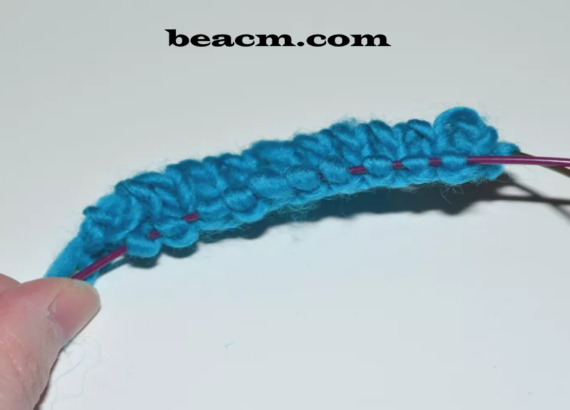
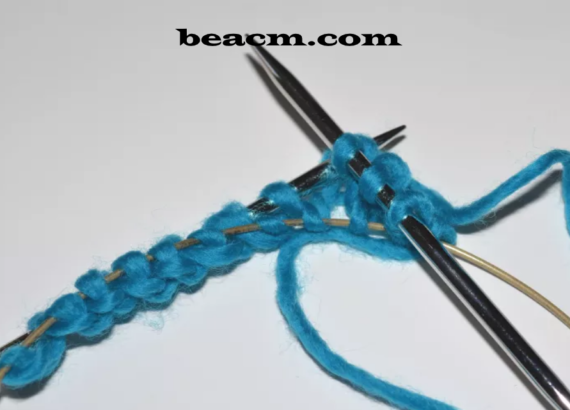
To practice this throwing method, work a few more rounds of straight knitting to see what it looks like. In this picture we have worked three rounds and you can already see how the toe shape is going.
For most knitting patterns with toe socks, you immediately step up for the foot. So if you follow a pattern, you should pay attention and start shaping when the pattern tells you to.