How to Macrame: 7 basic nodes to master

How to Macrame: 7 basic nodes to master
Create something new with macramé nodes
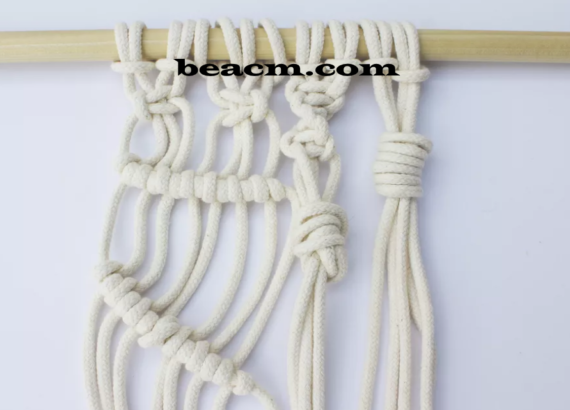
Macramé has been a popular way to decorate for decades, bringing texture and warmth to a home with knots that can be uniquely combined to create unique wall hangings, plant holders and more.
It’s easy to learn how to do macramé because you only need to know a handful of knots to create a macramé project.
Getting Reading to the Node
Before you learn how to learn macramé, gather your supplies and familiarize yourself with some common macramé terms that you need to know.
Supplies and Materials
Here’s what you need to learn and practice to practice your macramé knots:
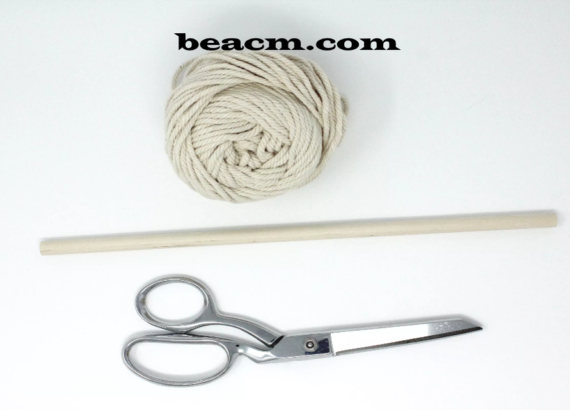
- Macramé string: This can be almost any kind of string, cord or rope made of cotton, hemp, jute or synthetic material. There are different sizes, colours and twists. In this tutorial we used a 3/16″ cotton cord, which is sold as a rope for clotheslines.
- Support: You need something to tie your knots to. Popular options are dowel bars, knots, hoops or rings. We have used a dowel bar for these knots.
- Scissors
Important macramé terms
There are some important macramé terms that you need to know before you can start.
- Working string: The string or set of strings you use to make the actual knots.
- Fill string: The string or set of strings around which your knots are wrapped.
- Sennit: A knot or a set of knots that are worked repeatedly.
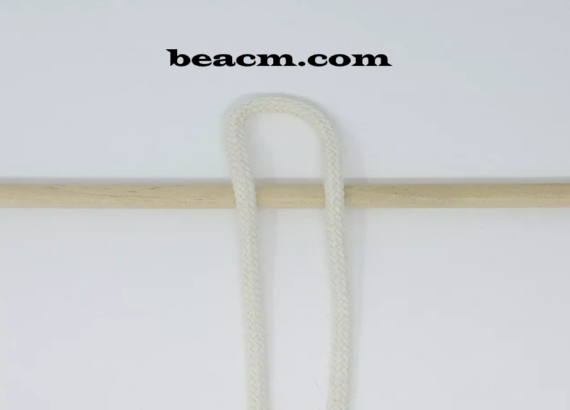
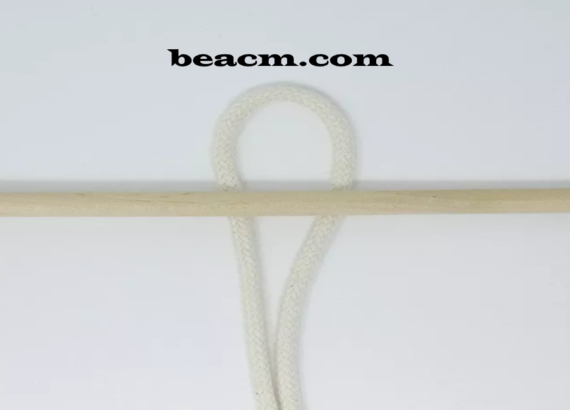
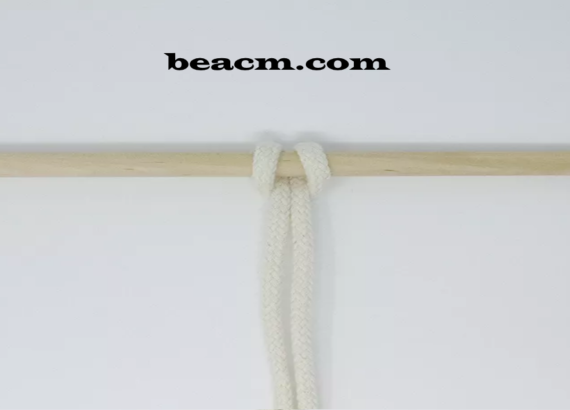
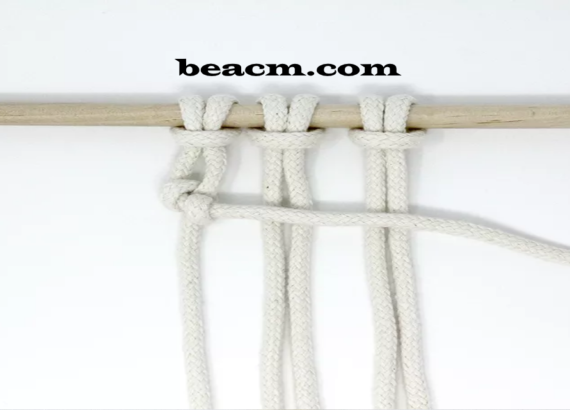
Lark’s Head Knot
The first knot you need to know is the Lark’s Head Knot, sometimes called the Cow Hitch Knot. This knot is used to attach your macramé string to an object such as a dowel, branch or anchor string.
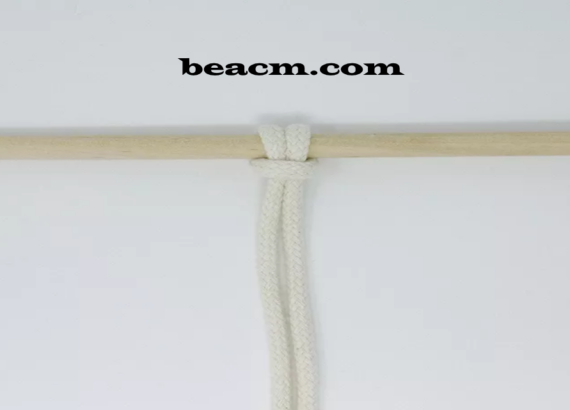
Fold your string in half and place the loop over the dowel bar.
Put the loop around your back and pull both ends of the cable through the loop to tighten it.
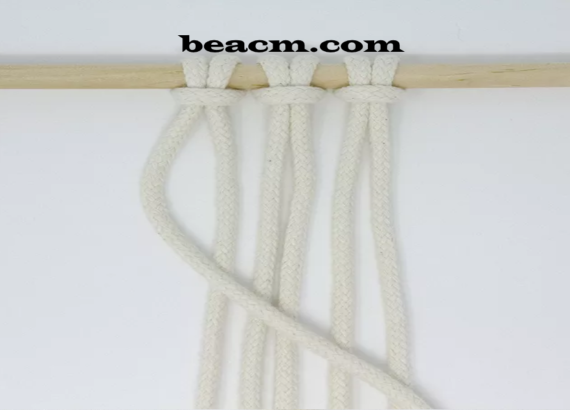
Reverse Lark’s Head Knot
The head knot of an inverted lark is done in reverse order so that the bump is hidden in the back part of the knot.
Fold the string in half and place the loop under the dowel bar.
Bring the loop forward and pull your two cords through the loop to tighten it.
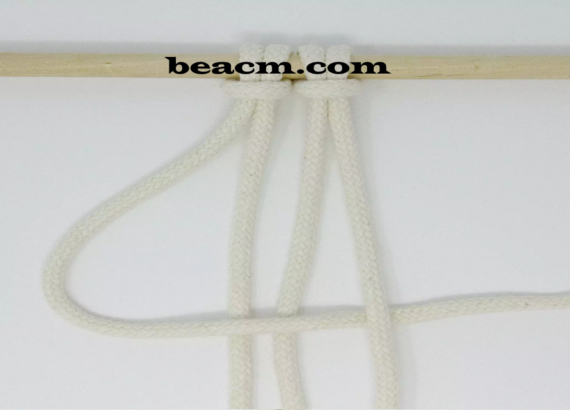
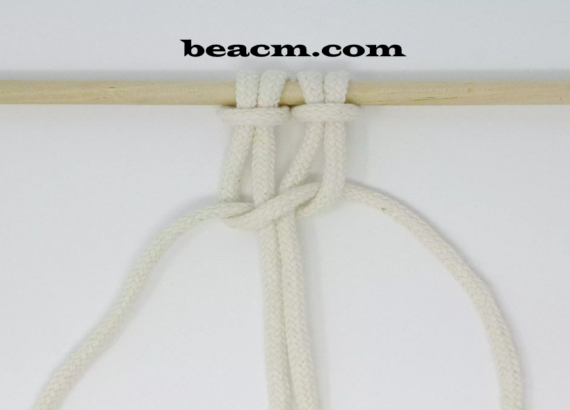
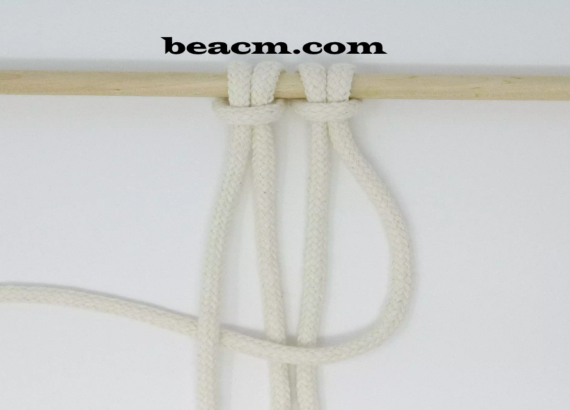
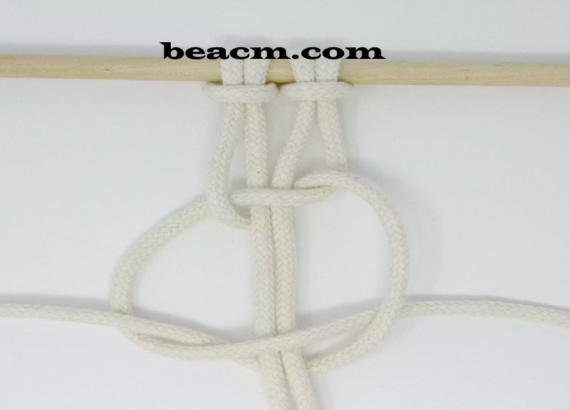
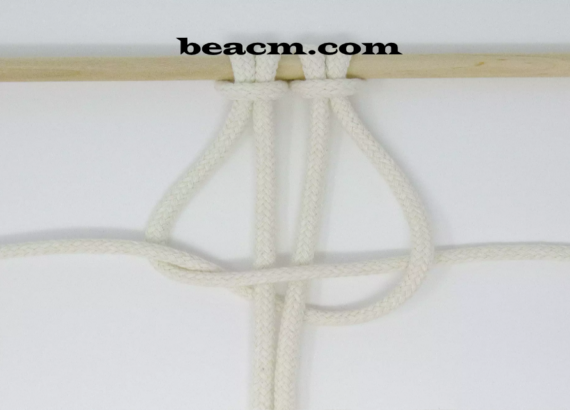
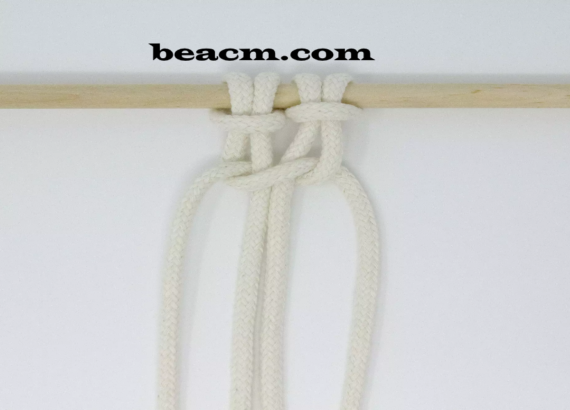
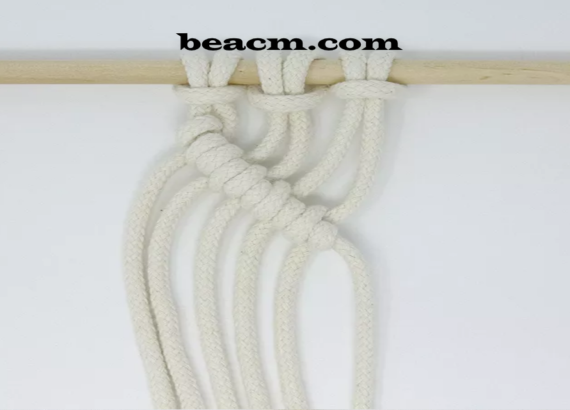
Square nodes and half nodes
A square node is one of the most commonly used macramé nodes and can be created as left or right-facing.
A half node is simply a half square node. It can point to the right or left, depending on which side you start on.
Square knots must have at least 4 cords (2 working cords and 2 filling cords), but can have more. The first and the last cord are the working cords. We call them working cables 1 and 4. The middle cables are filler cables and we number these 2 and 3. These cables change places but keep their original numbering.
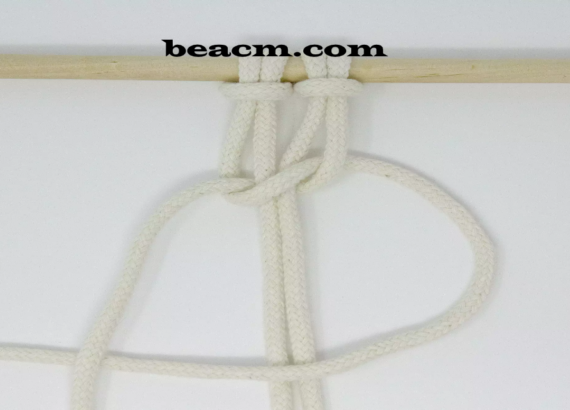
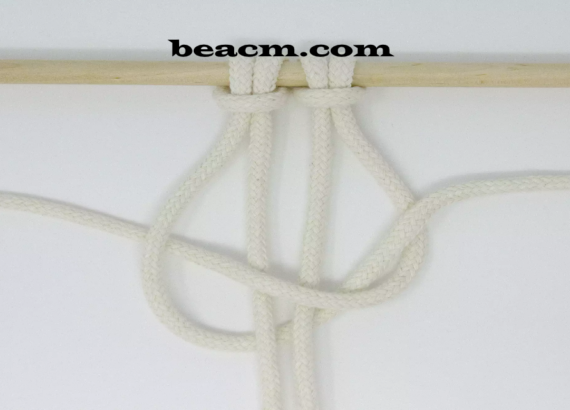
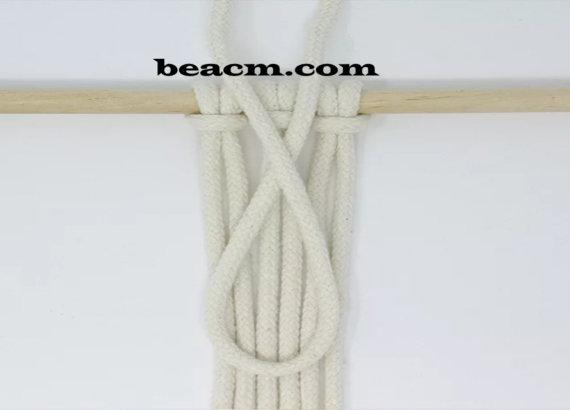
Left half knot and square knot
A square knot pointing to the left has a vertical elevation on the left side of the finished knot.
Take the first cable (working cable 1) and move it to the right over the middle filler cables (filler cables 2 and 3) and under the last cable (working cable 4).
Take the working cable 4 and move it to the left under the two filler cables and the revision cable 1.
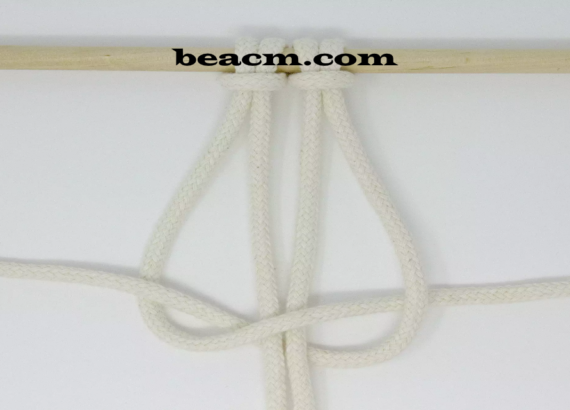
Pull both working cables to tighten and keep the filler cables straight. This is a half square knot pointing to the left.
The working cables have now swapped places with working cable 1 on the right and working cable 4 on the left. Take working cable 1 and move it to the left over the two filler cables and under working cable 4.
Take the working cable 4 and move it to the right under the two filler cables and the revision cable 1.
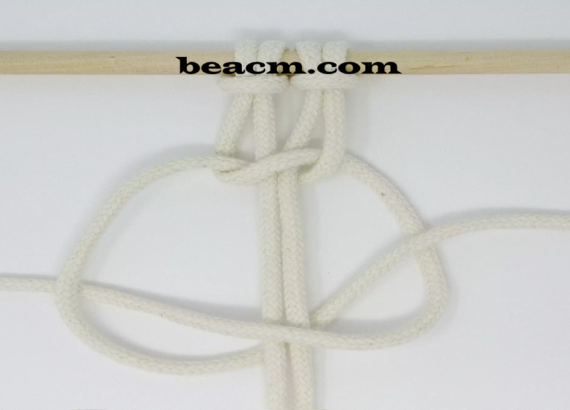
Pull on both working cables to tighten them. Keep the filler cables straight. This completes your left-facing square knot.
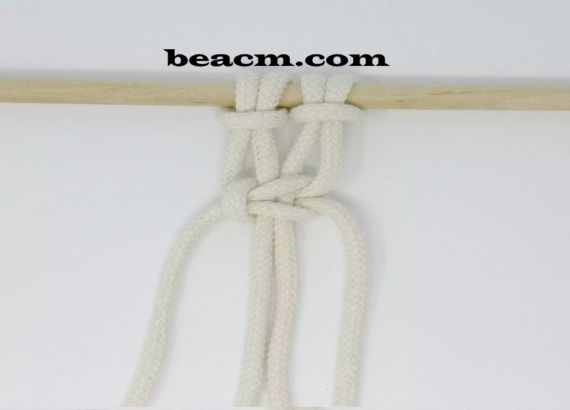
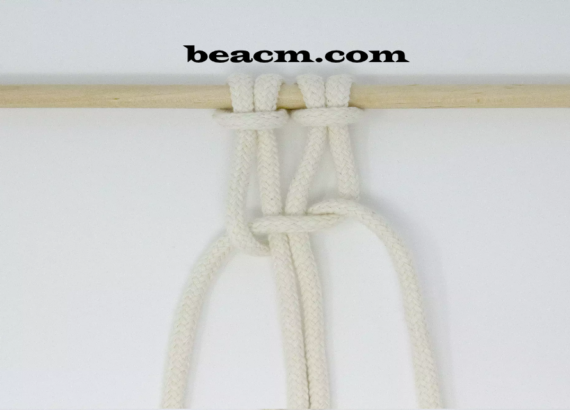
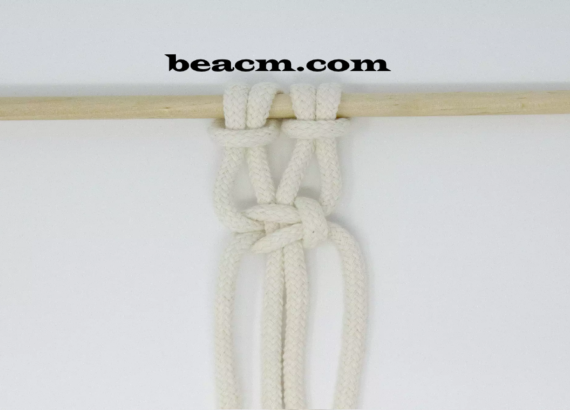
Half knot pointing to the right and square knot
A half knot pointing to the right and a square knot have a vertical rise on the right side of the finished knot.
Take the last cable (working cable 4) and move it to the left over the filler cables (cables 2 and 3) and under the first cable (working cable 1).
Take the working cable 1 and place it on the right under the filler cable and the revision cable 4.
Pull both cables to tighten and keep everything straight. This is a half square knot pointing to the right.
The working cables have now changed places and working cable 1 is on the right and working cable 4 is on the left. Take working cable 4 to the right, over the filler cables and under working cable 1.
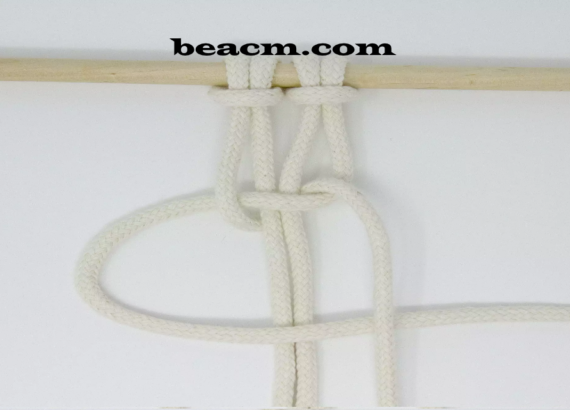
Take the working cable 1 and move it to the left, going under the filler cable and the revised cable 4.
Pull on both working cables to tighten them. This is a square knot pointing to the right.
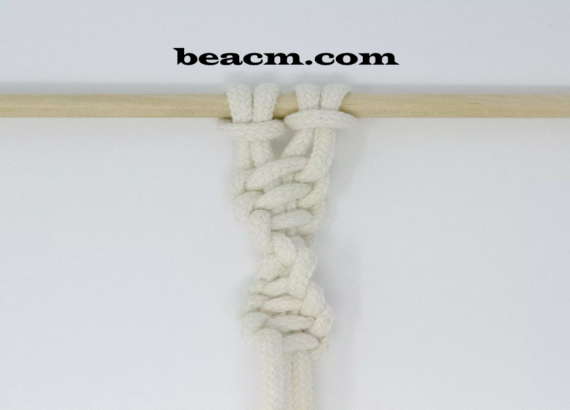
Spiral Stitch
A spiral stitch, also called Half Knot Sinnet or Half Knot Spiral, is a series of half knots to create a spiral stitch. This is a decorative knot that will add interest to your project.
A spiral stitch requires at least 4 cords, 2 working cords and 2 filling cords, but more can be used. Number these cords mentally from 1 to 4 and move them from left to right. Cables 1 and 4 are your working cables and cables 2 and 3 are your filling cables.
In these instructions, a left-directed spiral stitch is created. However, you can also start on the right side and use all half knots pointing to the right.
Take working cable 1 and move it to the right over the filler cables, but under working cable 4.
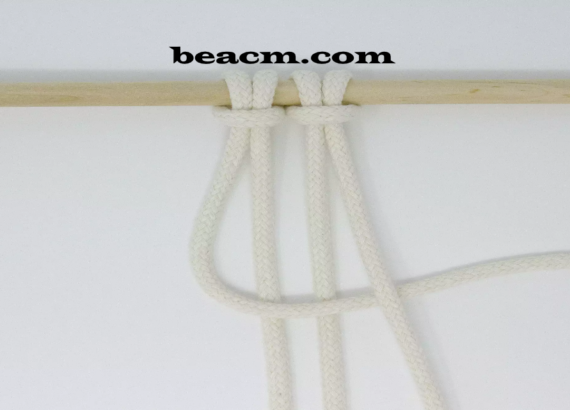
Move working cable 4 to the left and go under the filler cables, but rework cable 1.
Pull on both working cables to tighten the filling cables.
Make further half knots in the same way as above. As you work, your cords will start to spiral.
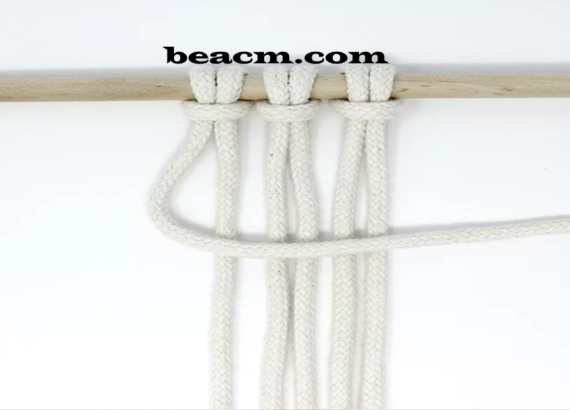
Cloves coupling
A clove coupling, also called Double Half Hitch, creates lines in your projects. They can be edited horizontally, diagonally and occasionally vertically.
Horizontal Clove Hitch
A horizontal clove coupling creates a series of nodes that extend across your macramé project. In this node, the first string is the fill string and the remaining strings are working strings.
Take your left cord, the filler cord, and hold it horizontally over the other cords.
Take the next line (your first working line) and lead it forward, up and around the filler line to the left to form a loop counterclockwise.
Take the same working line and to the right of the first knot, take it up, over and through the loop. There should now be two knots next to each other. This is a horizontal carnation knot.
Repeat the knots of the carnation clutch by using the next working line around the same filler line. Create more nodes until you have the desired appearance.

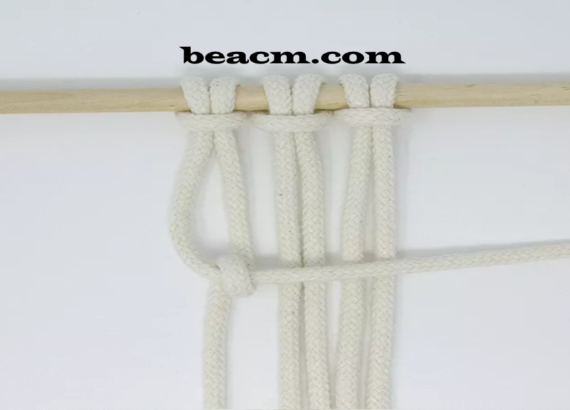
Diagonal Pink Clutch
A diagonal clove coupling creates a series of diagonal nodes in your project.
Take the cable on the left, the filler cable, and hold it diagonally across the other cables.
Repeat steps 2 to 4 of the horizontal clove clutch and move diagonally instead of straight down. Repeat until you have the desired appearance.
Overhand knot
The overhand knot is a basic knot that connects several lines with each other. This can be done with several cords or only one cord.
Fold the cable into a loop.

Pass the ends of the cables through the loop for tightening.

Collect nodes
A gathering knot, also known as a winding knot, is an end knot that joins together cords. You will often see them at the bottom of macramé plant hangers. There are two working cords in this knot. The rest of the cords are filler cables.
Take a separate length of cord (this is your working cord) and form a long U-shaped loop over the group of filler cords, with the loop facing down.
Begin your own of ending your working cable – and wrap it around the filler cable and the loop. Make sure you leave a little of the loop uncovered.
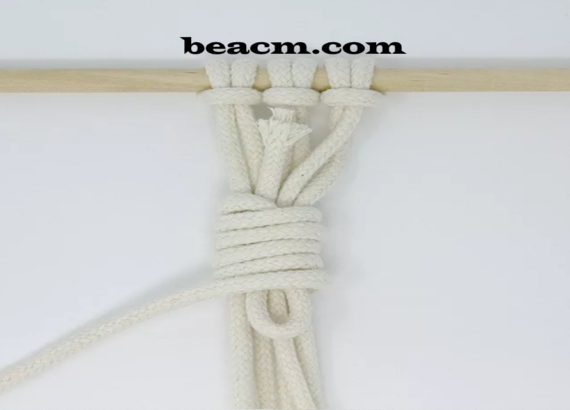
Pass the end of the wrapping cord through the loop at the bottom of your wraps.
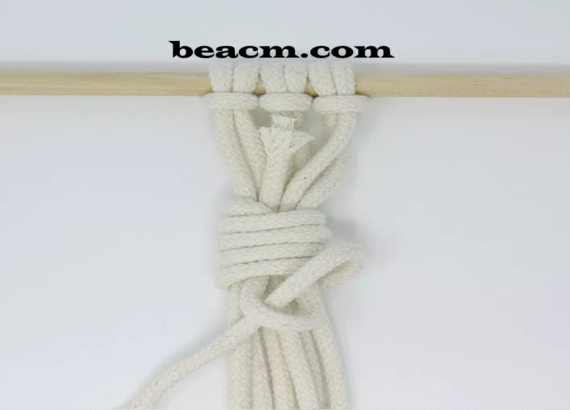
Pull the end of the working cable – which protrudes at the top – upwards to bring the loop under the sheath. Pull until the loop is enclosed in the wrapping.
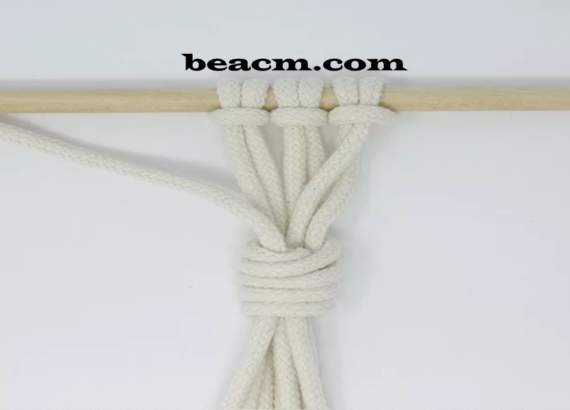
Your collection node is locked! If you wish, cut both ends of the working cable to get a clean finish.


