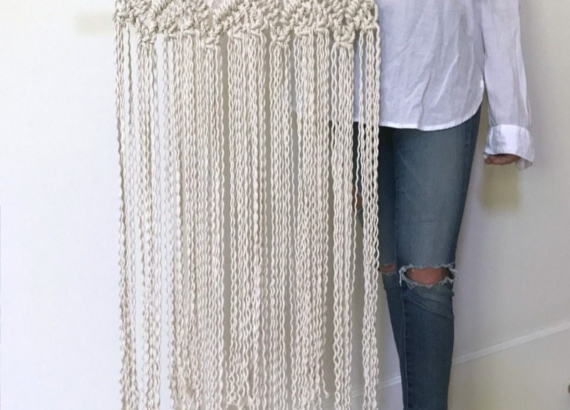
Learn how to create stunning macramé décor
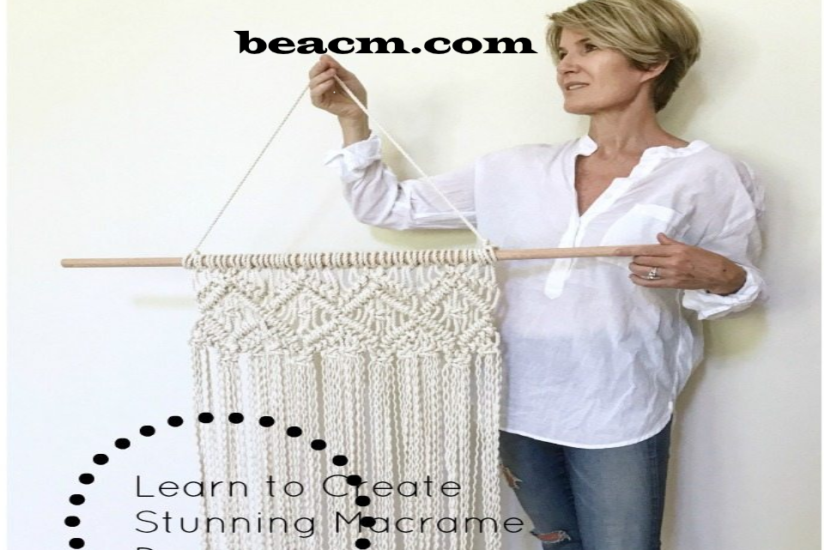
Learn how to create stunning macramé décor
In this post we will teach you how to create beautiful Wall Art macramas and answer all your macramé-related questions!
Learn everything you need to know to create stunning macrame projects. Jump from a beginner to a confident wizard in a few days with our macrame guide, our macrame resource list and our personal macrame advice.

So, you want to learn macramé? Or maybe you’re still asking yourself: “Can I learn it?” How hard is it really?
I’m here to uncover all the secrets of this funny retro-craft trend called macrame. There’s one thing I want to clear up before we get started. You can do that. I know you may still have your doubts. But that’s why I’m here, and that’s why I’m writing this macramé textbook. I’m going to answer all your questions and hopefully remove any prolonged hesitation. By the time we do that, you will a) have a beautiful, affordable macrame wall pendant or other macrame decor for your home, and b) be able to add macrame to your skill list.
Beginner Macramé
As in life, there are many ways to learn a new skill or craft. I’m not going to qualify as a macramé expert. In fact, I am an absolute beginner. From one beginner to another, I will just walk you through my personal journey to show you one of the ways to do it.
I will provide all the resources you need to find your own way to master the funny art of macramé. The most interesting thing is that you don’t need to be an expert to create absolutely beautiful decorative objects for your home. To be honest, it looks much more complicated than it is. So, let’s get to it.
Watch this short video on YouTube to see what this project looked like.
First: Practice How to Make Macramé
Why should you practice in the first place? Like everything else, this project will cost you a little. How much? Well, my first “real” project cost me about $30 for a macramé rope (or macramé cord, as it is sometimes called) and a couple of dollars for a wooden dowel.
Also, you can’t run away to Hobby Lobby or Michael’s and buy macramé rope or macramé cord. You will have to order it (more about this later). So, if I like you and want to start a project the day you finally tell yourself, “I want to start this,” I suggest you start like I did with the training project.
I ran to the Hobby Lobby and took some cotton thread and a small wooden plug.
I looked up “Easy Macramé Tutorial” on YouTube and voila, I started my first mini-project. There are a lot of projects and tutorials for beginners of macramé on YouTube.
Macramé practice.
The reasons why I recommend a small “training” project:
It fills in the time interval while you wait for the macrame rope.
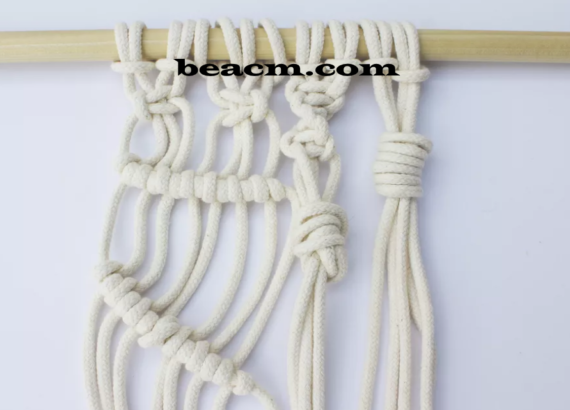
This will give you an overview of the different macramé nodes, their names and how they are made.
By the end of your training project, you will either be very happy and completely excited to become bigger or you will realize that this is not for you.
Completing this practical project will give you the confidence to invest your time and money to take the next step towards your first “real” macrame project.
Next: Which Macrame project should I do?
Decide which project you want to do. Take a look at the Macrame photos online. You can look for Etsy, Pinterest and Google. Do some research to see what’s there.
What types of macramé projects can I do? Start small.
- plant holder
- jewelry, including necklaces and bracelets
- wall-mounted
- bookmark
- Keychain
Big projects include:
- jogger
- hammock (save such a big project for later)
- Luminaire
- mat
- bed headboard
- festoon
- Decide on the type of project. Wall carpets and plant holders are two popular projects for beginners.
- Where will this go? This will help you determine what size you want to create.
- Find a style that you like. Freer and more organic or symmetrical with clean lines and easily defined patterns?
Where can I find macramé templates?
Once you have decided which type of project and which style you like, you are ready to look for the template. I found my template on Etsy for less than $5.
You don’t need to buy a template. There are several billions of videos uploaded to YouTube and you will find many projects that you may like. Three main reasons why I decided to buy the template:
- I was looking through Etsy to find ideas for what project I would like to do, and I realized that buying patterns are an option. I fell in love with a project that was exactly what I imagined.
- Templates are a very affordable option ($5-10).
- I liked the idea of not working side by side with the video, to stop and run it all the time. Being away from my computer sounded more relaxing to me.
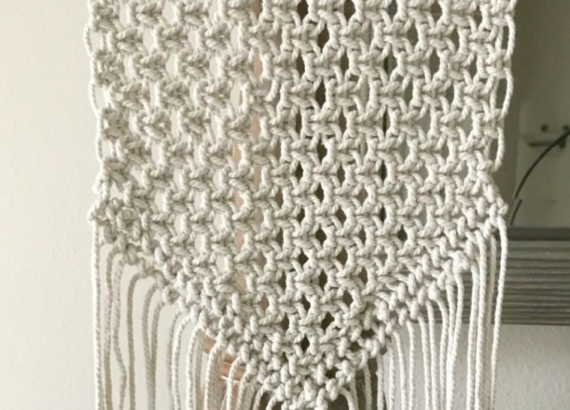
What macramé template did I use?
I had people asking me about my particular template. If you want to narrow it down and you’ve already fallen in love with this template, it’s called Four Diamonds by Reform Fibers. You can find her samples on Etsy.

What materials do I need for macramé?
When you have your project / template, you will know how many ropes to buy. I knew I wanted to use a natural cotton cord, but you can be guided by your own taste and style by choosing the color and material. They sell the rope (or cord) on Etsy.
- To give you an idea, my macrame project took 220 feet of 1/4″ (6mm) 3-stranded cotton rope.
Here’s a list of all the materials you’ll need:
- Cotton cord macrame (rope)
- Wooden or metal plug, or the equivalent of a branch of wood or snag (for a more natural look), if you are doing wall painting
- Suspension ring when creating a plant hanger
- Scissors
- Roulette
- Tape (I used paint tape, which was easy to remove, but sticky tape would also work).
- If you do not want to use the tape, you can “seal” the ends by melting the ends of the candle flame as an option.
- A movable clothes rack (or alternatively a hanging project, see below)
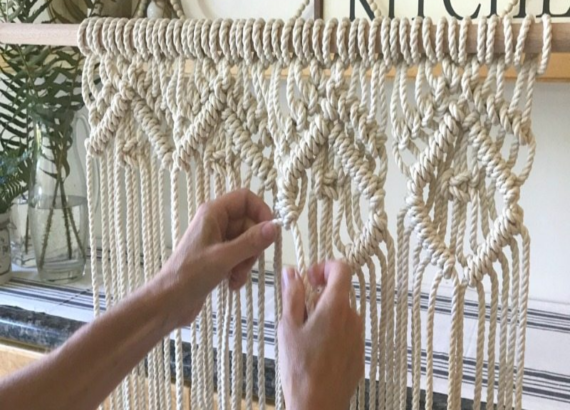
How long did my big Macrame project take?
- It depends a lot on which project you choose, but for me the actual work took about two and a half hours.
- In total, it took me about three hours because I was watching the nodes watching videos on YouTube.

Can I do that?
Yes, I’m here to tell you what you can do.
Here’s a little backstage recognition of my experience:
How many times does a macramé node need to be studied?
On my training project, I lost track of how many times I had to rewind the video to the beginning and start over. And yes, I had moments when I was wondering if it was really for me. So, it’s perfectly normal to have short-term doubts throughout the course.
Don’t let it stop you. You can’t “tie” a knot until your tenth time. But you’ll get it. Just keep plugging it in. Your moment ah-ha is not far off.

Confession number 1:
In my first project, I never got a “diagonal carnation knot”. No matter what I tried, it never looked like a video. I pulled out the whole row several times and started about three times. I finally decided to “let go.”
My hypothesis was that the small thread I was working with wasn’t right for that line. It just wouldn’t look the same. And guess what? I was right. As soon as I started working with a larger rope, the diagonal clove node looked exactly like the picture. What’s the lesson here? Do not give up, my friends.
Confession number two:
The first time I looked at the pattern, I thought I was reading a page in Chinese. There’s no need to panic. Remember what I said? You can do it. You can do what I did. Do it one step at a time. This is how you do it.
It’s not hard if you do it step by step and keep track of where you are. My only mistake that I made (I had to pull out a whole series) was because I was a little relaxed and didn’t pay enough attention to the step-by-step process.
Tip: To keep track of where you are in the steps, I recommend using a marker and marking the steps as they progress.